Drywall Troubleshooting Guide · Commercial & Residential Quality
All Drywall Installation Problems and Our Solutions, With Steps, in Vancouver
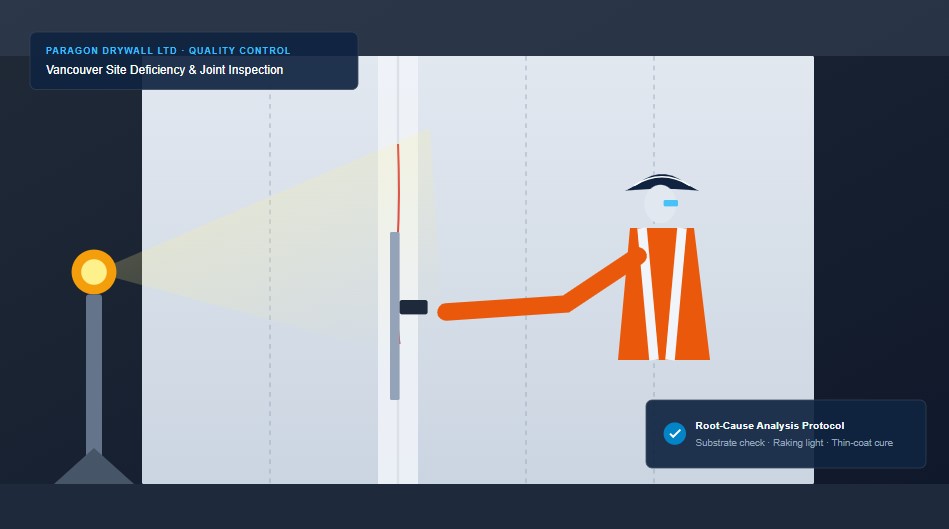
Every drywall project runs into problems, from nail pops to moisture damage. What matters is how quickly they are found and fixed. As an established commercial drywall contractor serving Vancouver and the Lower Mainland, we handle these issues on commercial and residential projects every week. When general contractors, architects, or developers call our team to take over or inspect a project, we know that lasting repairs require identifying the root cause rather than merely troweling a cosmetic skin over structural defects. Below are the problems we see most often and the exact steps we take to solve them.
Quick Answer
The most common drywall installation problems are nail pops, cracks, visible joints, moisture damage, uneven walls, sagging ceilings, fire and sound gaps, and delays. A reputable commercial drywall contractor solves them by finding the cause first, then repairing the substrate, refinishing in thin coats and inspecting the result under intense raking light.
Why Drywall Problems Happen in Vancouver
Vancouver's wet coastal climate, accelerated construction schedules, and strict code reviews under the BC Building Code put extraordinary stress on drywall assemblies. Damp gypsum boards stored on open floors absorb ambient moisture, while rushed taping over green lumber and unprotected framing triggers joint failures as soon as permanent HVAC systems turn on. As an experienced commercial drywall contractor in British Columbia, we know that temperature cycling, atmospheric humidity swings above 80%, and structural timber shrinkage account for the vast majority of cosmetic callbacks. Most problems are preventable with disciplined project planning, but every competent drywall subcontractor must also master field-proven repair protocols when deviations occur.
Eight Common Drywall Problems and Our Step-by-Step Solutions
Whether on a multi-residential concrete tower in Burnaby, a tenant improvement in downtown Vancouver, or a custom residential home in North Vancouver, our field superintendents deploy systematic hold points to rectify defects cleanly. Here is how our commercial drywall installation crews troubleshoot the eight most pervasive challenges:
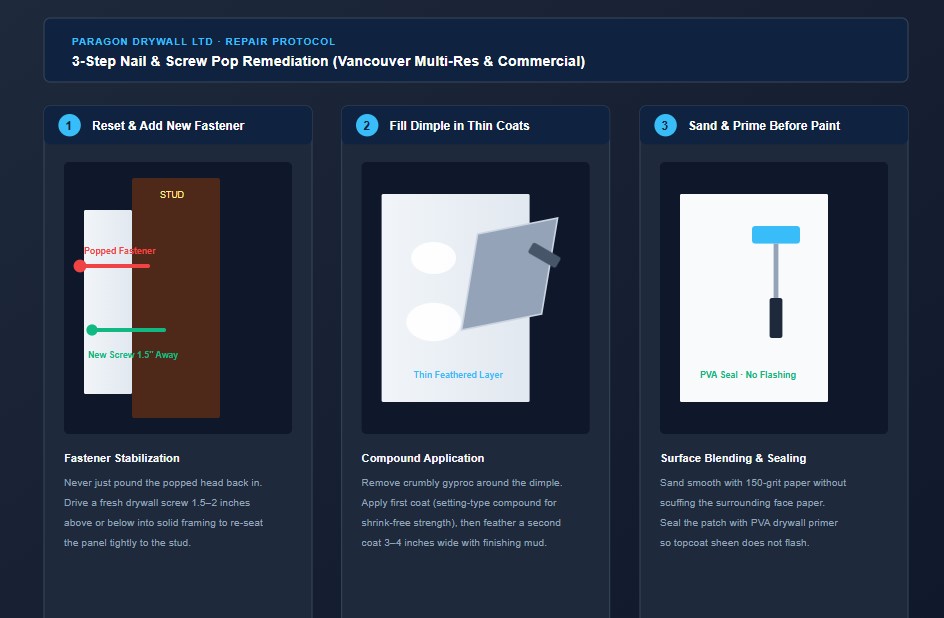
1. Nail and Screw Pops
Cause: Wood framing dries and shrinks over the first heating season, pulling the stud inward while the fastener head remains stationary, or screws were overdriven, puncturing the paper facing. In light-gauge steel framing, screw pops occur when fasteners strip out or were driven at an angle.
- Reset and Reinforce: Re-seat the popped fastener, then drive a new high-thread bugle screw 1.5 to 2 inches directly above or below into solid backing to draw the board flush against the stud.
- Fill in Thin Coats: Clear any fractured core material, then fill the recessed dimple with high-bond setting-type compound across two thin applications.
- Sand and Prime: Feather smooth with 150-grit sandpaper, apply a high-solids PVA drywall primer to seal surface porosity, and spot-paint to match existing texture.
2. Cracks at Joints and Corners
Cause: Structural truss uplift, foundation settling, rapid thermal expansion, insufficient compound bedding under paper tape, or compound forced to cure too quickly in high heat.
- Cut Out Loose Compound: Score a clean V-groove along the fracture with a sharp utility knife, vacuuming away pulverized gypsum dust and loose tape remnants.
- Embed High-Tensile Tape: Bed heavy-duty paper tape or cross-fiber mesh into fresh chemical-cure setting compound, pressing firmly to eliminate air voids.
- Add Control Joints on Long Runs: Where continuous partitions exceed 30 feet (9 meters) or cross structural building movement joints, install zinc expansion control beads according to GA-216 specifications.
3. Visible Joints, Ghosting and Flashing
Cause: Uneven joint compound crowns, suction differentials between porous paper face and dense joint mud, or low-angle sunlight raking across expansive commercial corridors.
- Inspect with Raking Light: Position an intense 500-watt inspection lamp parallel to the wall plane to expose joint shadows and uneven transitions before painting.
- Skim Coat to a Level 5 Finish: Trowel or spray a continuous, pinhole-free skim coat of joint compound across the entire wall face to equalize absorption.
- Prime the Whole Surface: Apply a dedicated Level 5 vinyl-acrylic primer/surfacer across the complete assembly before applying topcoat enamel.
4. Moisture, Mould and Water Damage
Cause: Plumbing leaks, exterior building envelope moisture ingress during construction, or installing boards in unconditioned suites with relative humidity exceeding 70%.
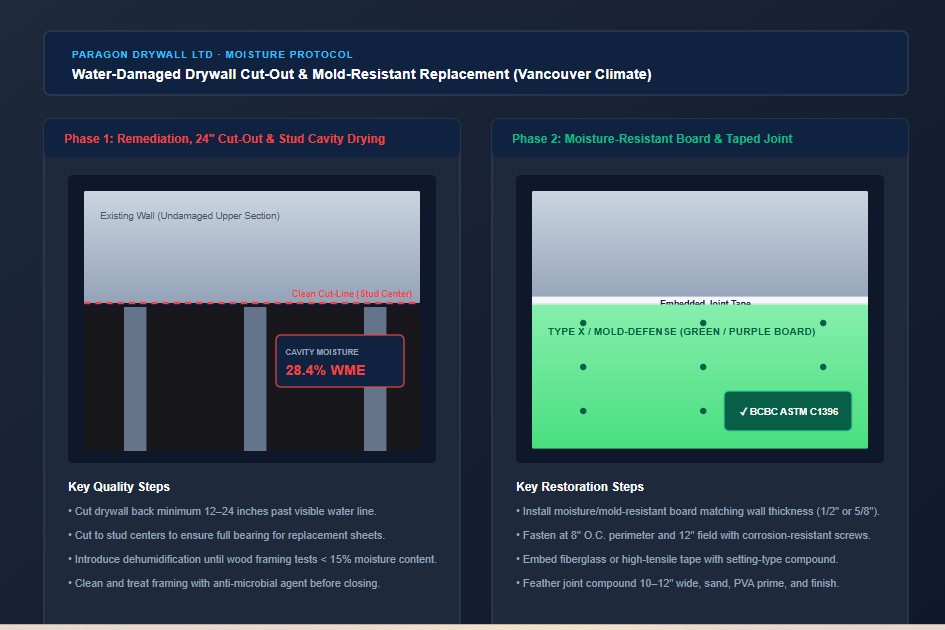
- Find and Repair the Source: Trace moisture pathways with non-destructive pin meters and thermal cameras, halting all water intrusion before opening drywall.
- Remove Damaged Board and Dry Framing: Cut back damaged panels 12 to 24 inches past visible water lines to stud centers. Run commercial LGR dehumidifiers until wood moisture content drops below 15%.
- Install Moisture-Resistant Board: Re-board the cavity with ASTM C1396 moisture-and-mold-resistant panels (green board or fiberglass-mat purple board) using coated, corrosion-resistant fasteners.
Safety Note: Large mould colonies exceeding 10 square feet pose respiratory hazards under WorkSafeBC guidelines and must be isolated and remediated by a certified abatement contractor before reconstruction begins.
5. Uneven Walls and Ridges
Cause: Twisted timber studs, misaligned steel track, uneven concrete slab deflections, or combining 1/2-inch and 5/8-inch boards on the same wall plane.
- Check Framing with a Straightedge: Run a 6-foot precision level across framing planes prior to boarding to flag low studs or bowing studs.
- Shim or Furr Out Stud Planes: Affix drywall shims or adjustable resilient metal furring channels (RC-1) to bring plane variances within 1/8 inch over 10 feet.
- Feather Compound Wide: When minor framing variations remain, feather joint compound 12 to 14 inches on either side of the seam to taper the optical ridge.
6. Sagging Ceilings
Cause: Installing 1/2-inch interior drywall on ceiling framing spaced 24 inches on center without sag-resistant formulation, inadequate fastener count, or heavy insulation loads combined with ambient dampness.
- Confirm Board Thickness and Joist Spacing: Ensure all ceiling spans match BC Building Code requirements (5/8-inch Type X or certified sag-resistant 1/2-inch gypsum board).
- Add Fasteners and Perimeter Support: Re-screw sagging field panels every 7 inches on center along ceiling joists, reinforcing with construction adhesive where accessible.
- Replace Permanently Deformed Sheets: Cut out panels that have permanently deflected or whose gypsum core has softened from moisture exposure.
7. Fire and Sound Gaps
Cause: Unsealed plumbing and electrical penetrations through rated demising walls, omission of acoustic sealant beads at top and bottom track, or missing board layers in multi-residential party walls.
- Identify Rated Walls on the Drawings: Review architectural schedules for 1-hour and 2-hour ULC fire-resistance ratings and STC 50+ acoustic separation requirements.
- Rebuild to the Listed Assembly: Stagger board joints by at least 16 inches between layers in double-layer systems, ensuring no seams overlap between base and face plies.
- Seal Penetrations with Firestop and Acoustic Sealant: Pack annular spaces with certified mineral wool and apply ULC-listed intumescent firestop and non-hardening acoustic caulking at all perimeters.
8. Delays and Rework
Cause: Late material deliveries via crane hoists, MEP trade conflicts inside stud cavities, or closing walls before municipal rough-in inspections are stamped.
- Order Early Against Supplier Lead Times: Stage board and compound pallets floor-by-floor 2 to 3 weeks in advance of installation milestones.
- Coordinate Weekly Trade Walkthroughs: Align electrical, plumbing, HVAC, and low-voltage rough-in completions prior to boarding starts.
- Get Written Sign-Off Before Boarding: Enforce strict pre-drywall hold points so walls never close before city inspectors sign off the rough-in.
For comprehensive staging and multi-trade synchronization strategies, see Paragon Drywall Ltd. Company guides to commercial drywall project planning and drywall around electrical and plumbing.
Where Problems Show Up: Commercial vs Residential
While fundamental drywall finishing tools remain similar across project types, the structural conditions and failure modes differ significantly between heavy commercial spaces and residential dwellings. Below is how common drywall installation problems manifest across sectors in the Lower Mainland:
| Problem | Commercial projects | Residential projects |
|---|---|---|
| Nail and screw pops | Less common with heavy-gauge steel studs; occurs primarily if screws stripped track flanges. | More common as solid wood framing dries, shrinks, and twists over seasonal heating cycles. |
| Cracks at joints | Long continuous corridor runs and structural slab movement require engineered expansion joints. | Stress concentrations at corner door headers, vaulted ceiling peaks, and window returns. |
| Ghosting and flashing | Exposed across expansive open-plan corporate walls and elevator lobbies under intense downlights. | Prominent on two-storey feature walls, stairwells, and rooms with oversized south-facing windows. |
| Moisture issues | High-traffic commercial washrooms, shared laundry facilities, and unconditioned parkade shafts. | Ensuite bathrooms, basement suites, kitchen backsplashes, and crawlspace perimeter partitions. |
| Fire & sound gaps | Rated 1-hour and 2-hour exit corridors, mechanical shafts, and electrical utility closets. | STC 50+ party walls separating neighboring multi-residential condo units and duplex demising walls. |
How We at Paragon Drywall Ltd. Company Prevent Repeat Problems
Deficiency lists cost general contractors time, reputation, and margin. To eliminate punch-list callbacks before client handovers, our site superintendents enforce five non-negotiable field standards on every commercial drywall installation:
- Keep boards dry and stored flat: Gypsum pallets are stored elevated off concrete slabs in enclosed rooms with active humidity control below 60% RH.
- Confirm rough-ins are approved before boarding: Crews never hang drywall until our superintendent confirms mechanical, electrical, and plumbing rough-ins have received municipal inspector sign-off.
- Apply compound in thin coats with proper drying time: We reject heavy one-coat fills, utilizing setting-type compounds (Durabond/Easy Sand) for embedding tape followed by thin finishing coats cured under controlled heat.
- Approve a finish mock-up before full production: We construct an on-site sample room with specified primer and lighting to establish visual Level 4 or Level 5 standards before building-wide taping begins.
- Walk the site and fix deficiencies on a shared punch list: Our quality control leads perform 100% raking light inspections on each floor, rectifying minor flaws before the painter mobilizes.
What to Ask Your Commercial Drywall Contractor
Before awarding a multi-suite commercial or residential subcontract in Metro Vancouver, ask prospective drywall contractors these four diagnostic questions to gauge their technical problem-solving capabilities:
- How do you find the cause of a problem before repairing it? Look for a subcontractor who inspects framing alignment, structural deflection, and moisture content instead of simply skimming compound over an active crack.
- Do you offer a documented punch list and warranty process? A professional commercial drywall company maintains transparent digital deficiency tracking and backs their workmanship with an explicit written warranty.
- How do you handle moisture and mould concerns on site? Verify their protocol for humidity monitoring, removal of water-damaged gypsum, and coordination with environmental remediation specialists.
- Are your WorkSafeBC clearance and insurance current? Confirm valid WorkSafeBC coverage in good standing and at least $5,000,000 in commercial general liability insurance.
Clear, detailed answers show a commercial drywall contractor who has solved these exact problems dozens of times on active Vancouver job sites.
Local Experience You Can Verify
Paragon Drywall Ltd. Company is a woman-owned commercial drywall subcontractor serving Vancouver, the Lower Mainland, and the Fraser Valley. With over 15 years of uninterrupted site operations, our teams specialize in tenant improvements, corporate fit-outs, mid-rise developments, and large-scale multi-residential drywall installations. We maintain full WorkSafeBC coverage in good standing, carry comprehensive $5M commercial liability coverage, and hold certifications for ULC fire-stopping and acoustic partition engineering. Whether solving pre-existing job-site defects or delivering clean Level 5 architectural finishes, our commitment to proactive trade coordination protects your project schedule.
Get Drywall Problems Solved by a Commercial Drywall Contractor
Need a reliable commercial drywall contractor to fix or prevent drywall problems on your Vancouver project? Send us your architectural drawings, deficiency photos, or construction timeline. Our technical estimators will diagnose the underlying causes and provide an actionable, cost-effective repair schedule.
Frequently Asked Questions
Quick, direct answers to common drywall installation problems and repair procedures in Vancouver.
What are the most common drywall installation problems?
The most common problems are nail or screw pops, cracks at joints and corners, visible joints or ghosting, moisture damage, uneven walls, sagging ceilings, fire and sound gaps, and project delays. Most can be prevented with dry materials, proper framing, thin compound coats and inspections.
How do you fix nail pops in drywall?
Reset the popped fastener and add a new one nearby, fill the dimple with compound in thin coats, then sand and prime before painting. If pops keep returning, check the framing for movement or moisture.
Why does drywall crack at joints and corners?
Cracks usually come from building movement, poor taping or compound that dried too quickly. A repair cuts out loose compound, embeds new tape and refills in thin layers. Control joints can help on long runs where the design allows.
Can water-damaged drywall be repaired?
Often yes, if the leak is fixed and the framing is fully dry. Damaged board is removed and replaced, ideally with moisture-resistant board where specified. Large mould areas should be handled by a qualified remediation firm before drywall work.
Do commercial and residential drywall problems differ?
Yes. Commercial projects see more issues with long wall runs, strong lighting and rated corridors. Residential and multi-residential projects see more pops, corner cracks and sound gaps between suites. The repair methods are similar, but the inspection requirements differ.
Does Paragon Drywall serve areas outside Vancouver?
Yes. Vancouver Paragon Drywall Ltd. Company near you, serves commercial and multi-residential projects across the Lower Mainland and the Fraser Valley.